Decorating a blank canvas of kraft paper always brings back childhood memories of doodling on my brown bag-covered textbooks (remember those?). Kraft paper has a lovely texture and handmade feel to it, and decorating it by hand makes it even more unique and special. Also, black kraft paper is a stunning backdrop for white or silver permanent markers, which are just right for the holidays.
This is a perfect crafting project to do on your own or with children. My children, ages 7, 5, and 2, loved making these with me, especially painting the paper altogether. I am planning to have a few friends over myself for a DIY gift wrap night, fueled by hot chocolate and cookies.
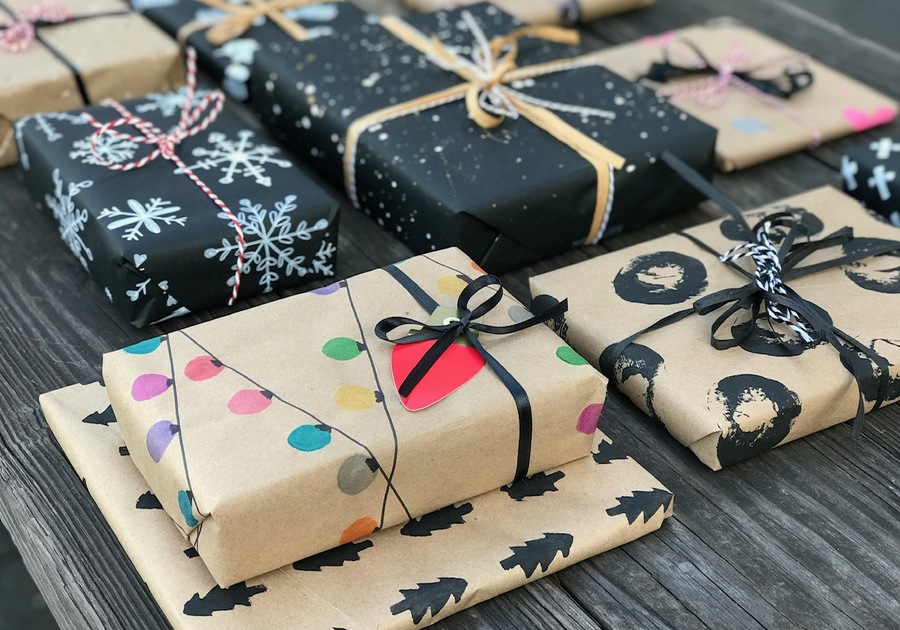
If you are wrapping a collection of gifts, using just these two papers and varying the decorations on them makes for a gorgeous and cohesive assortment, even when each wrap is different. So, get yourself a roll of brown or black kraft paper, and let your creativity run wild! Here are four ideas to help you get started:
Potato Stamping
Supplies:
- Brown/Black Kraft Paper
- Large Potato
- Knife
- Permanent Marker
- Paper Towels
- Foam Paint Brush
- Black/White Acrylic Paint
If you would like an oval “potato” design:
- Cut the potato in half, keeping the cut surface of the potato as straight and level as possible, so it stamps evenly onto the paper.
- Use the foam brush to apply acrylic paint to the cut surface of the potato.
- Have your child stamp the potato on the paper to make an oval pattern design.
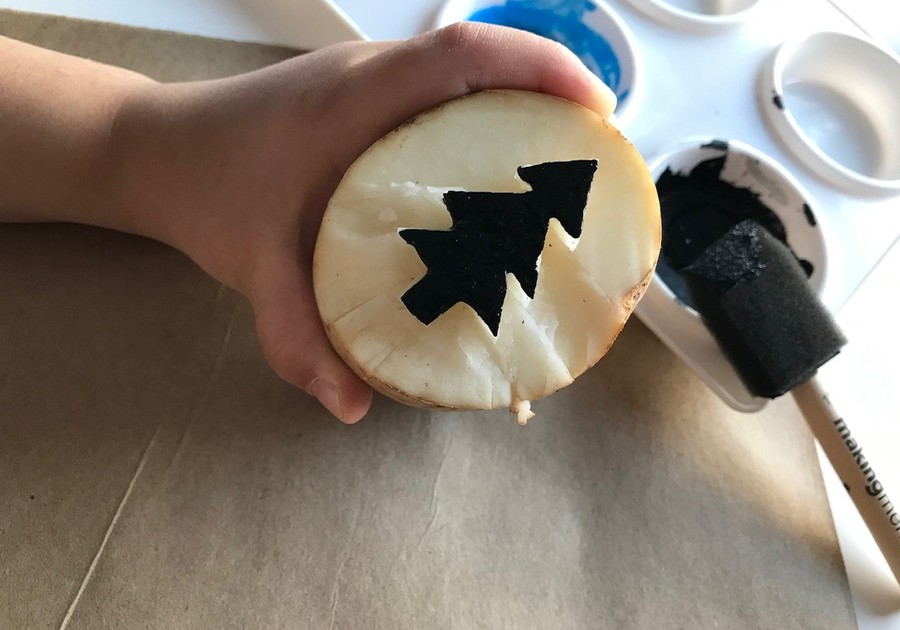
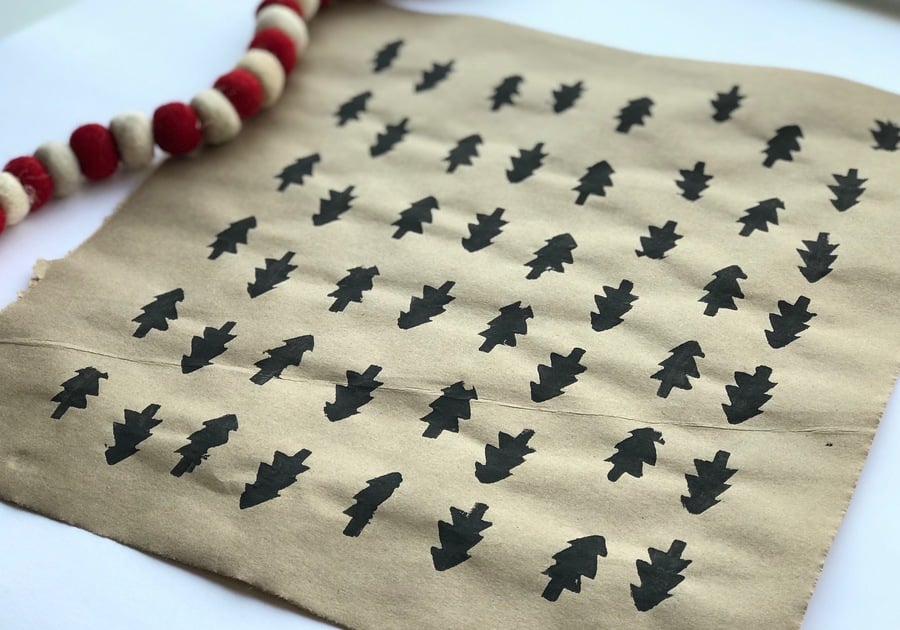
If you would like to stamp a custom shape:
- Use a knife to carve out a shape from the cut surface of the potato.
- Draw your design onto the cut potato surface with a permanent marker.
- Carve out around the shape, taking at least a 1/4 inch of potato flesh away from around the shape, so that the shape will be the only part of the potato stamping on the paper.
- Dry out the potato before stamping by resting it on a folded paper towel for a few minutes
- Use the foam dabber to apply paint just to the shape that you have cut out of the potato.
- Hold the potato down evenly on to a piece of paper and stamp. If part of the shape is not showing up, apply paint again and press down, rolling it slightly up, down, right, and left, before lifting it up off the paper.
Abstract and Splatter Painting
Supplies:
- Brown/Black Kraft Paper
- Acrylic Paint
- Water
- Paintbrushes
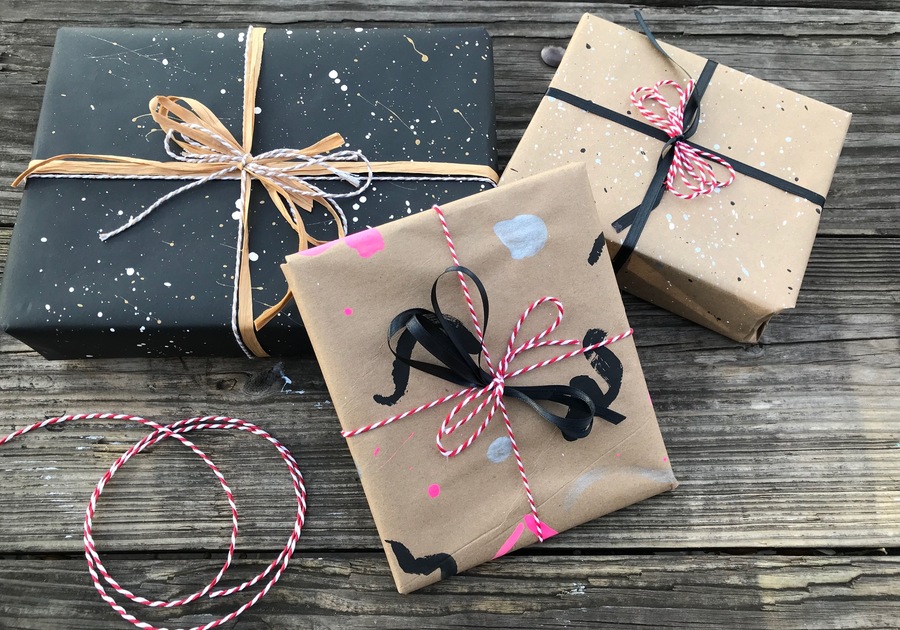
For splatter painting:
- Tear off a large sheet of kraft paper and choose two or three acrylic paint colors to work with. I love black, white, silver, gold, and sometimes, neon accents.
- Add a couple of drops of water to each paint color to help the paint to flow easily.
- Dip various sized brushes in the paint and splatter away. Tapping the brush with paint on it will help it to splatter easily as well.
For abstract painting:
- Set up a large sheet of kraft paper and set it on a table with your kids placed around the table.
- Put out two to four different colors of acrylic paint, adding a couple of drops of water to help it flow.
- Ask your child to make abstract designs on their area of paper. Turn the paper periodically, so each child has a new area to work on and his/her designs are distributed across the wrap. Remind your children to leave space in between shapes, so the wrap does not get crowded and retains a patterned feel.
Dot Marker Fun
Supplies:
- Brown Kraft paper
- Dot Markers
- Permanent Marker
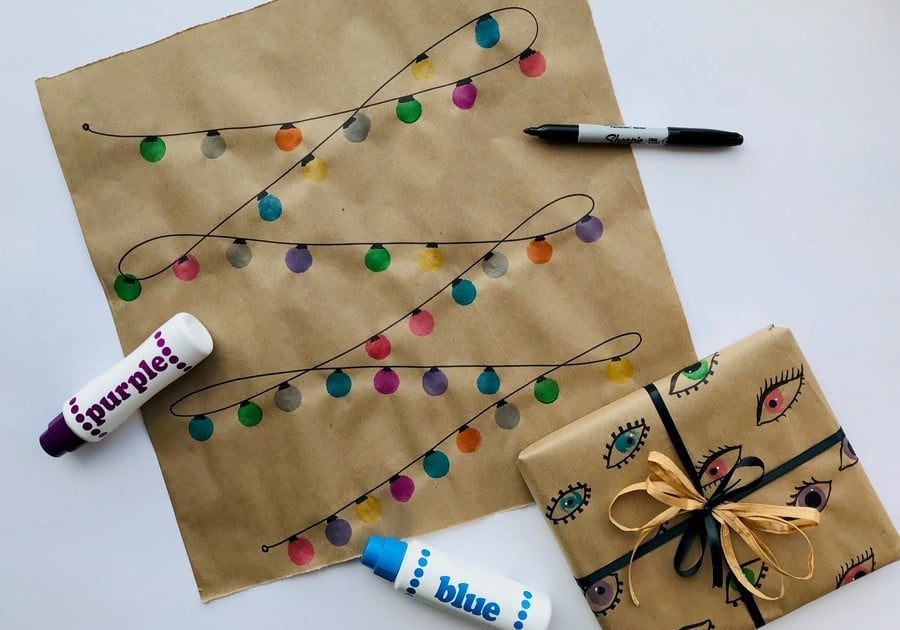
Dot markers are a lot of fun for kids because no matter what age they are, they have to press the marker down to create perfect circles in various colors. They also have a spongey tip, which creates a handmade effect.
For the ornament paper, I used a black permanent marker to make a string design and draw ornament tops spaced out on the string. My daughter then used the dot markers to create the ‘ornaments,’ which make for a festive holiday wrap. I prefer this to paint because there is less mess and a consistent shape and size with dot markers.
I also used dot markers to create a quirky eye design gift wrap. There are endless possibilities for using dot markers to make reindeer faces (just add drawn antlers), caterpillars, confetti, and so on.
Permanent Marker Doodling
Supplies:
- Brown/Black Kraft Paper
- White Permanent Paint Marker
- Black Permanent Marker
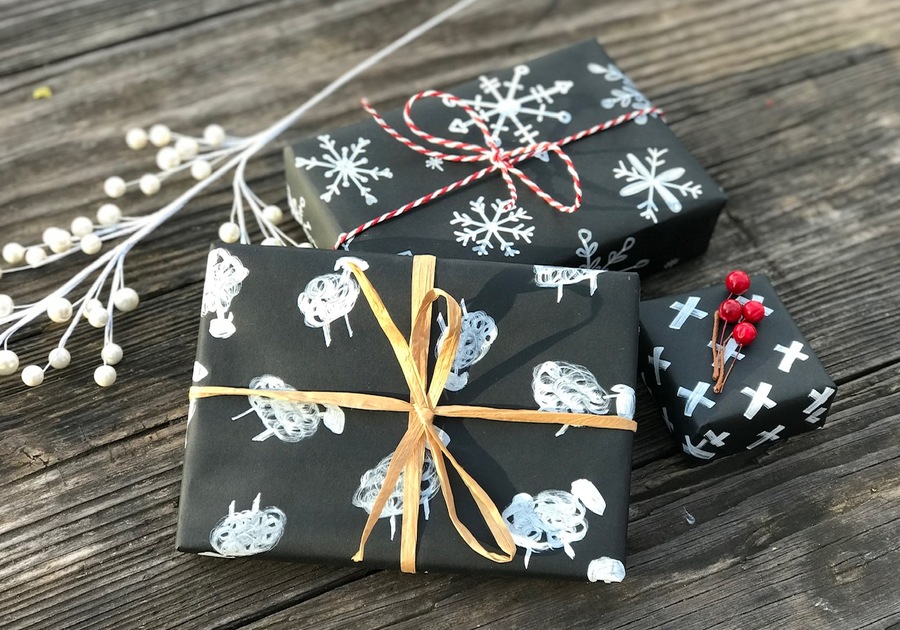
1) White markers such as the Sakura PenTouch 2.0mm White Ink Marker show up beautifully on black or brown kraft paper. You can also use a chisel tip marker like Michael’s Broad Tip Chalk Marker.
The key to doodling to make gift wrap is to create a pattern by repeating a general design and leaving some negative space between the designs. The designs do not need to be evenly spaced. We have loved making snowflakes, sheep, and swiss crosses on black paper, but any design could work as long as the design is repeated.
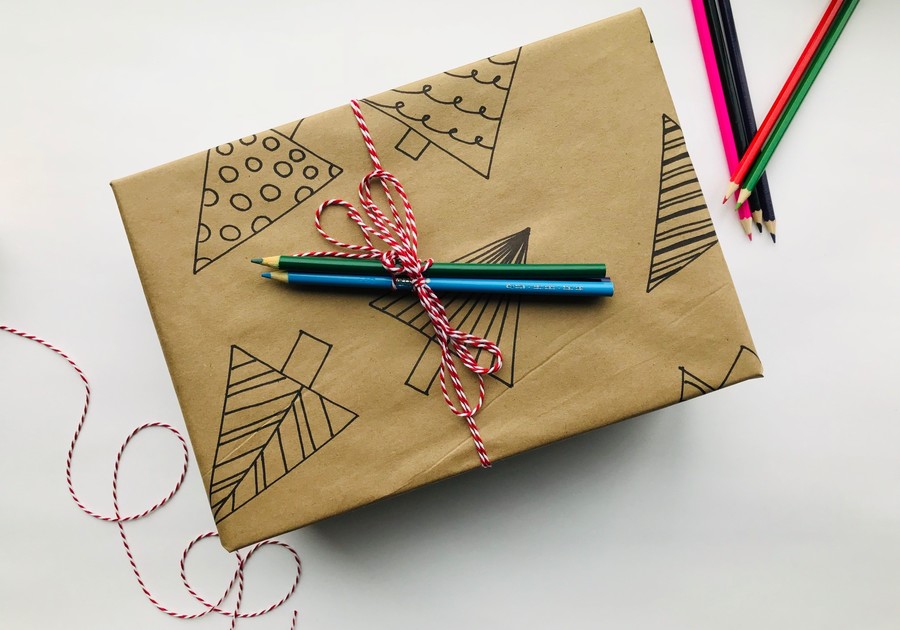
2) An interactive idea when giving a gift to children is to make wrapping paper that kids can color. Draw outlines of a design (I chose trees) with a permanent marker in a pattern on kraft wrapping paper and use it to wrap your gift. When tying the ribbon, attach crayons or colored pencils to the bow so the kids can get coloring!
Enjoy!
 |  |  |
Macaroni KID Lower Manhattan is the family fun go-to source for the latest and most comprehensive information in our area. Subscribe for FREE today!